manager@kiaev6.org (915) 212-77133

Kia EV6: Removal and Installation - 4WD

Removal

Kia EV6. Removal and Installation - 4WD   

• When working on high voltage system, the work should be performed by technicians who have completed the relevant training. It is because that lack of knowledge of the high voltage system can lead to serious accidents due to electric shock or electric leakage.

• When working a high voltage system, the technician must be recognized and observe "General Safety Information and Caution". If do not follow, serious accidents like electric shock and short circuit are caused.

• When working on high voltage system, make sure to check the Personal Protective Equipment (PPE) and high voltage shut-off procedures.

Kia EV6. Removal and Installation - 4WD   

• Use a fender cover to protect the painted surface.

• Be careful not to damage the connector when disconnecting.

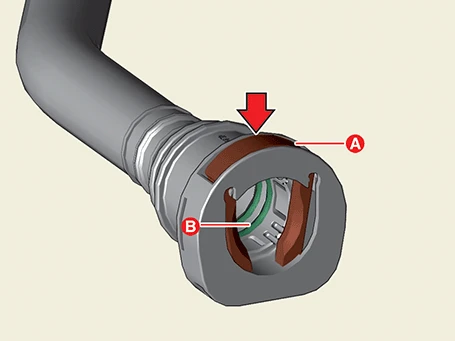
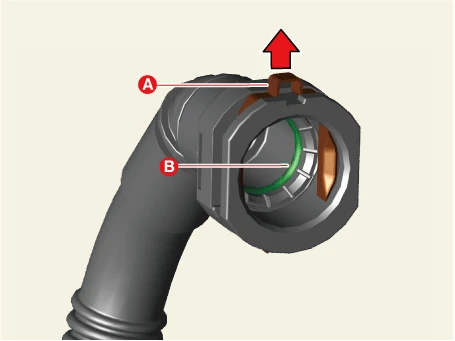
• When disconnecting a quick connector, refer to the following according to the type of quick connector.[Type A]- Remove the while pressing the quick connector clamp (A) in the direction of the arrow.- Do not touch the rubber seal (B) inside the hose.

Kia EV6. Removal and Installation - 4WD

[Type B]- Pull the quick connector clamp (A) in the direction of the arrow to separate the clamp and remove the hose.- Do not touch the rubber seal (B) inside the hose.

Kia EV6. Removal and Installation - 4WD

1.Disconnect the battery negative ( - ) terminal and the service interlock connector.(Refer to Battery Control System - "Auxiliary 12 V Battery")

2.Remove the front under cover.(Refer to Motor and Reduction Gear System - "Front Under Cover")

3.Drain the battery system coolant.(Refer to Cooling System - "Battery Coolant")

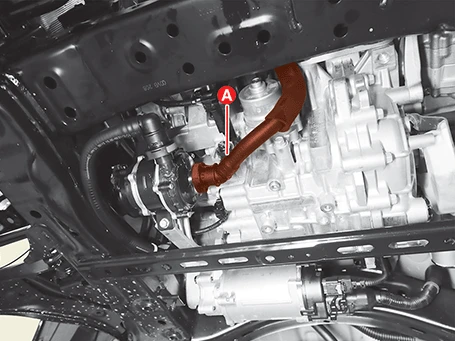
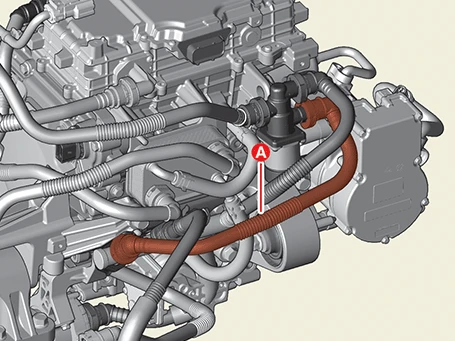
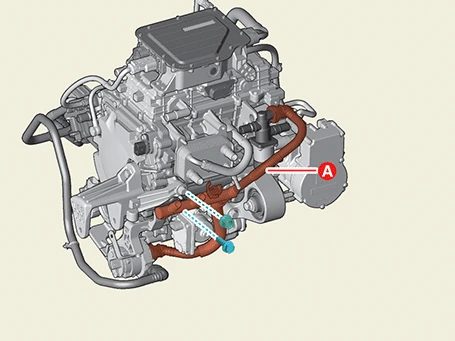
4.Disconnect the Electric Water Pump (EWP) cooling hose (A).

Kia EV6. Removal and Installation - 4WD

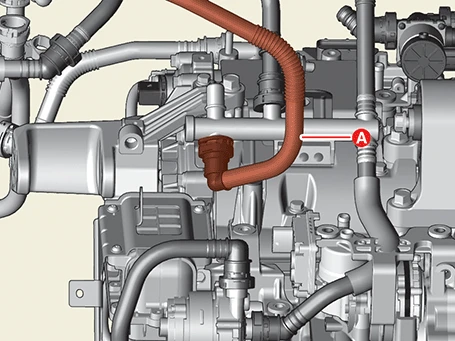
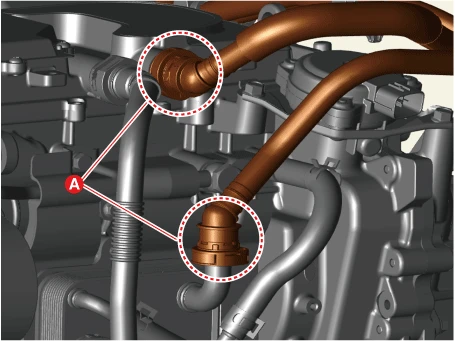
5.Disconnect the distribution pipe cooling hose (A) after releasing the quick connector.

Kia EV6. Removal and Installation - 4WD

Kia EV6. Removal and Installation - 4WD

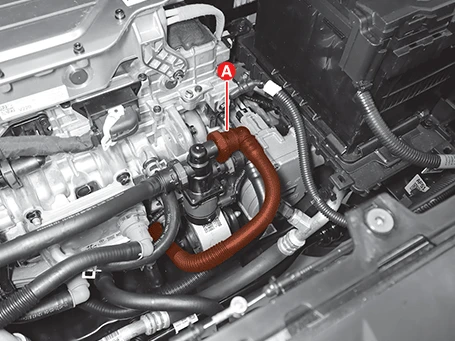
6.Disconnect the distribution pipe cooling hose (A) after releasing the quick connector.

Kia EV6. Removal and Installation - 4WD

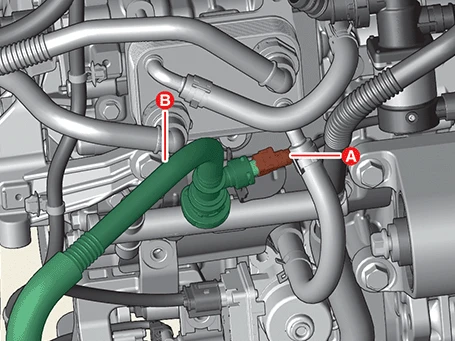
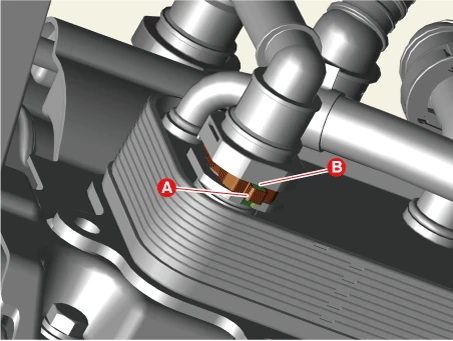
7.Disconnect the coolant temperature sensor (A), and then disconnect the high-voltage battery cooling hose (B) by releasing the quick connector.

Kia EV6. Removal and Installation - 4WD

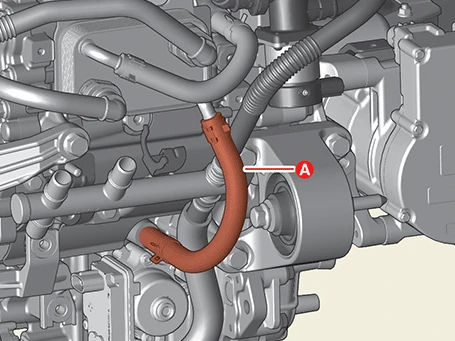
8.Disconnect the motor and reduction gear oil cooler hose (A) after releasing the quick connector.

Kia EV6. Removal and Installation - 4WD

9.Remove the coolant distribution pipe (A) after removing the bolts and nut.

Tightening torque :16.7 - 23.5 N·m (2.0 - 2.4 kgf·m, 14.5 - 17.3 lb·ft)

Kia EV6. Removal and Installation - 4WD

Installation

1.Install in the reverse order of removal.

Kia EV6. Removal and Installation - 4WD   

Make sure the quick connector is installed securely after installing coolant hose.[Type A]- Make sure the quick connector (A) is installed securely.

Kia EV6. Removal and Installation - 4WD

[Type B]- Make sure the quick connector and quick connector clamp is installed securely.- Make sure that the quick connector protrusion (A) fits into the groove (B).

Kia EV6. Removal and Installation - 4WD

2.Fill the high voltage battery system coolant.(Refer to Cooling System - "Battery Coolant")

Kia EV6. Removal and Installation - 4WD   

Using the KDS under actuation test, perform air bleeding actuation for Electric Water Pump (EWP).

    Previous pageRemoval and Installation - 2WD

    Removal     • When working on high voltage system, the work should be performed by technicians who have completed the relevant training. It is because that lack of knowledge of ...

    PREV
    Other information:

    Kia EV6 (CV) 2022– Workshop Manual: Precaution In Case Of Danger
    Precautions in case of danger     The EV vehicle comes equipped with a high voltage battery that can cause serious injury, like electric shocks, or even death when malfunctioning or mishandled, so follow the manual below. For additional information refer to Emergency Rescue Gu ...

    Kia EV6 (CV) 2022– Workshop Manual: Inspection
    Inspection Component Inspection 1.Check for continuity between the terminals in each switch position as shown below. Switch Switch position Switch terminal Resistance (Ω, ±3.5%) Front wiper switch MIST 6 - 4 330 ...