Removal

1.Remove the rear wheel and tires.(Refer to Tires/Wheels - "Wheel")
2.Remove the height sensor. [If equipped](Refer to Body Electric System - "Intelligent Front-lighting System (IFS)")
3.Remove the rear shock absorber lower bolt (A), washer (B), and nut (C).
Tightening torque :176.5 - 196.1 N·m (18.0 - 20.0 kgf·m, 130.2 - 144.7 lb·ft)
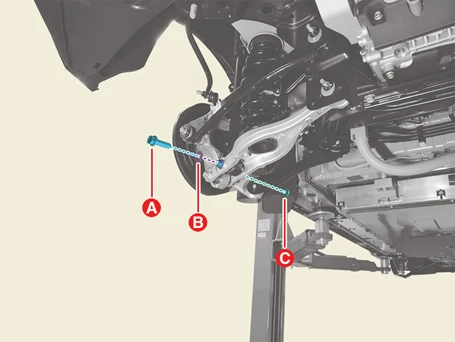

• Install the transmission jack and lift up the parts to prevent the bolts and nuts from damage when installing or removing.
• Mark and remove all bolts and nuts to prevent incorrectly positioned installation.

4.Remove the rear lower arm nut (A), washer (B), and bolt (C).
Tightening torque :176.5 - 196.1 N·m (18.0 - 20.0 kgf·m, 130.2 - 144.7 lb·ft)
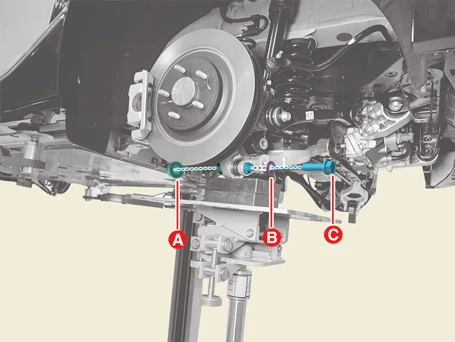

• Install the transmission jack and lift up the parts to prevent the bolts and nuts from damage when installing or removing.
• Mark and remove all bolts and nuts to prevent incorrectly positioned installation.

5.Lower the rear lower arm in the direction of the arrow, then remove the rear coil spring (A).
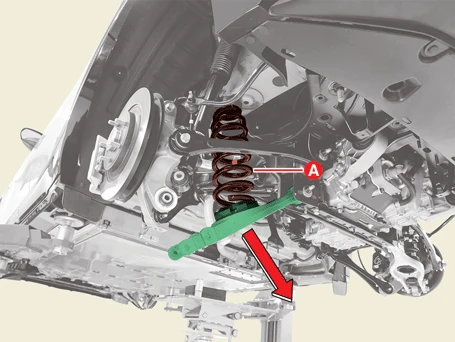
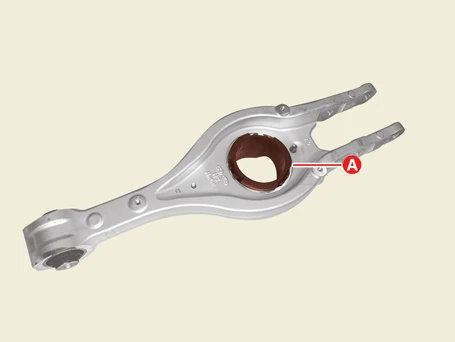
6.Remove the rear coil spring lower pad (A) from the rear lower arm.
Installation
1.Install in the reverse order of removal.

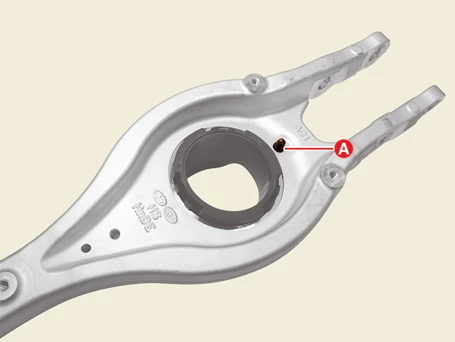
• After installation, check the prostrusion (A) on the top of the rear lower arm and reinstall the lower arm pad if the prostrusion (A) is not fully exposed.
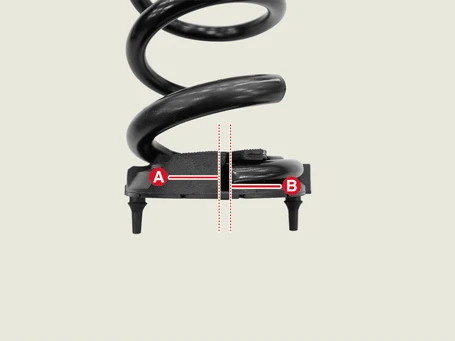
• When installing the rear coil spring, mount it so that the surface (A) of the lower pad of the spring and the end of the spring (B) contact as much as possible.
Maximum allowable gap : 3 mm (0.1181 in.)
2.Check the alignment.(Refer to Alignment - "Repair Procedures")
Inspection
1.Check the coil spring for cracks or deformation.
2.Check the coil spring pad for damage and deformation.