Removal

• When working on the high voltage system, the work should be performed by technicians who have completed the relevant training. A lack of understanding of the high voltage system can lead to serious accidents due to electric shock or short circuit.
• When working on the high voltage system or related components, be sure to observe and be aware of the "Safety Precautions, Cautions and Warnings". If not, it may cause serious accidents due to electric shock or short circuit.
• When working on high voltage system, make sure to check the Personal Protective Equipment (PPE) and high voltage shut-off procedure.
1.Remove the front pillar trim.(Refer to Interior Trim - "Front Pillar Trim")
2.Remove the inside rear view mirror assembly.(Refer to Mirror - "Inside Rear View Mirror")
3.Remove the auto defogging sensor.(Refer to Heating, Ventilation and Air Conditioning - "Auto Defogging Sensor")
4.Remove the front view camera unit.(Refer to Advanced Driver Assistance System (ADAS) - "Front View Camera")
5.Remove the cowl top cover.(Refer to Body - "Cowl Top Cover")
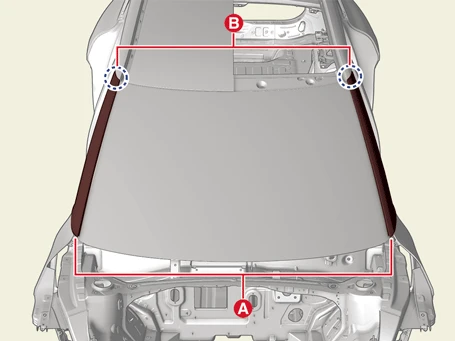
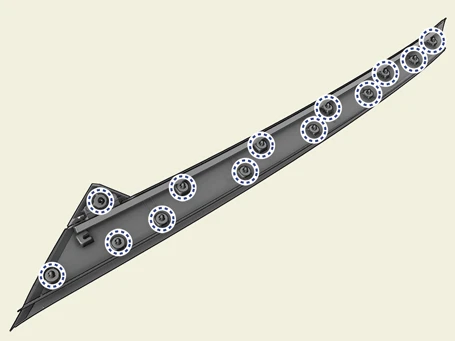
6.Remove the A-pillar garnish (A) from the top part (B).
7.Carefully cut the windshield glass molding using a cutter knife (A).

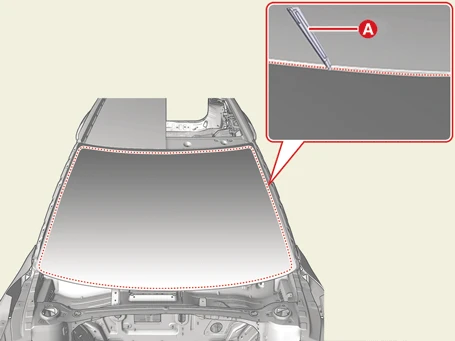
8.Put in a piano wire (A) to the corner side.
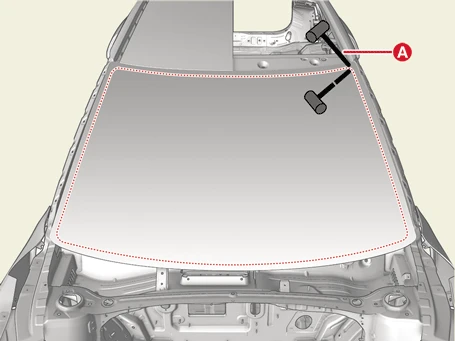
9.Cut off the sealant of forward edge side (B) by pulling the piano wire (A) left and right.

• Wear gloves to protect hands from injury.
• Be careful not to burn the hands, as excessive heat may be generated while using the wire.
• Be careful and use caution as wire may break and cause inury.
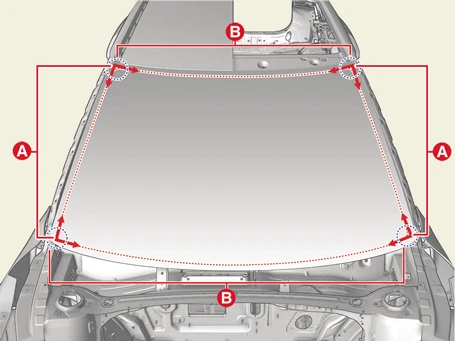
10.Cut off the sealant on (A-A), (B-B) area, while pulling the piano wire to the left and right.
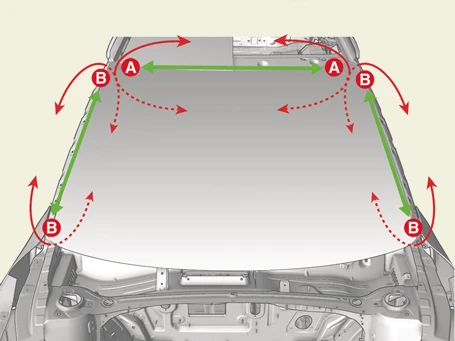
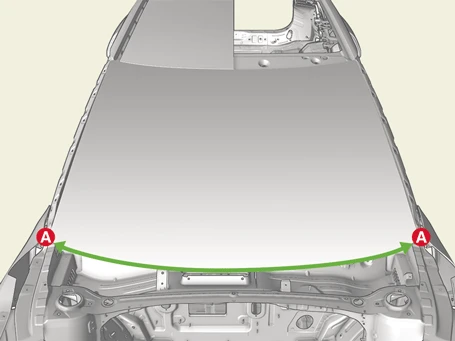
11.Cut off the sealant between (A-A) area by using a cutter knife.


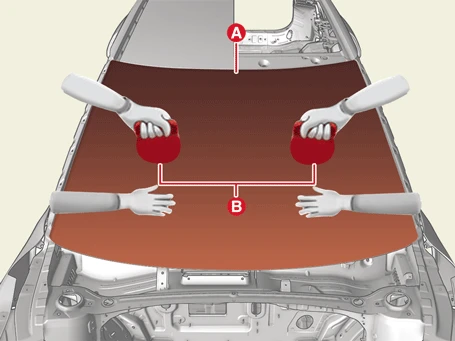
12.Remove the windshield glass (A) carefully using glass holder (B).
Installation

• When working on the high voltage system, the work should be performed by technicians who have completed the relevant training. A lack of understanding of the high voltage system can lead to serious accidents due to electric shock or short circuit.
• When working on the high voltage system or related components, be sure to observe and be aware of the "Safety Precautions, Cautions and Warnings". If not, it may cause serious accidents due to electric shock or short circuit.
• When working on high voltage system, make sure to check the Personal Protective Equipment (PPE) and high voltage shut-off procedure.

1.Cut off leaving about 2mm-thick sealant (0.079 in.) at the bonding surface around the body panel by using a cutter knife. Marking the glass and body if a new windshield glass is used.

• Be careful not to damage the body surface.
• If damaged, apply repair paint or anti-corrosion agent.
2.Clean the edges of the body panel and the windshield glass with alcohol, etc.
3.Apply a body primer to the edge of the body panel.

• Be careful not to touch the primed surface with your hands, as water leakage may occur after the windshield glass is installed.
• Do not apply the glass primer to the body.
• Do not smear the primer-covered surface to any foreign materials.
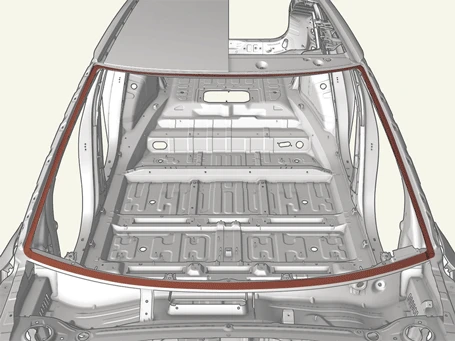
4.Apply the glass primer to the edge of windshield glass.

• Be careful not to touch the primed surface with your hands, as water leakage may occur after the windshield glass is installed.
• Do not apply the glass primer to the body.
• Not to smear the primer-covered surface to any foreign materials.
• Apply the sealant within 5 minutes after applying the primer.
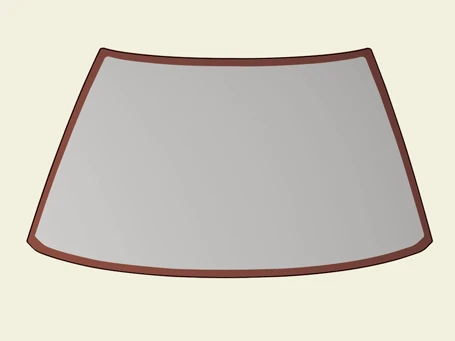
5.Apply the sealant (B) around the windshield glass (A) using a sealant.
Sealant Bead WidthHeight :12mmWidth :8mm
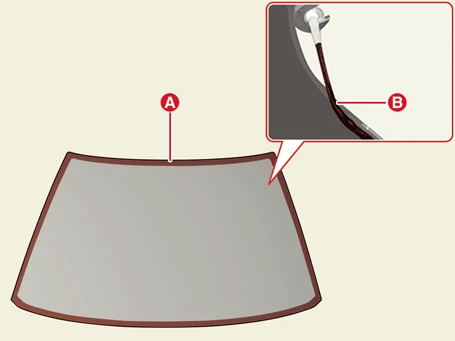
6.Using the glass holder, adjust the windshield glass (A) to stopper hole (B) on the body and carefully tap the windshield glass to fully seat the edges on the bonding surface of body.
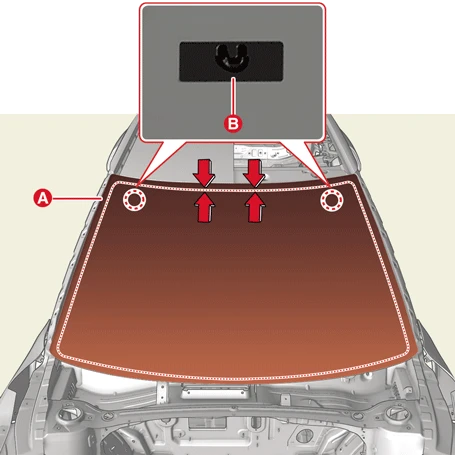
7.Conduct water leak testing.

8.When a water leak occurs, apply the sealant at the water leak area.

• Leave the car on a flat surface for at least 4 hours after installing the windshield glass.
• If driving the car is inevitable, drive at a low speed in least 8 hours.
• Be careful and avoid aggressive driving or driving uneven roads for 2-3 days.
9.Install the A-pillar garnish.
10.Install the front view camera.(Refer to Advanced Driver Assistance System (ADAS) - "Front View Camera")
11.Install the auto defogging sensor.(Refer to Heating, Ventilation and Air Conditioning - "Auto Defogging Sensor")
12.Install the inside rear view mirror assembly.(Refer to Mirror - "Inside Rear View Mirror")
13.Install the cowl top cover.(Refer to Body - "Cowl Top Cover")

14.Install the front pillar trim.(Refer Body - "Front Pillar Trim")