Removal

• When working on the high voltage system, the work should be performed by technicians who have completed the relevant training. A lack of understanding of the high voltage system can lead to serious accidents due to electric shock or short circuit.
• When working on the high voltage system or related components, be sure to observe and be aware of the "Safety Precautions, Cautions and Warnings". If not, it may cause serious accidents due to electric shock or short circuit.
• When working on high voltage system, make sure to check the Personal Protective Equipment (PPE) and high voltage shut-off procedure.
1.Remove the front bumper assembly.(Refer to Body - "Front Bumper Assembly")
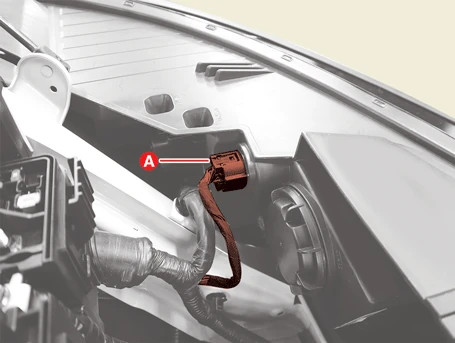
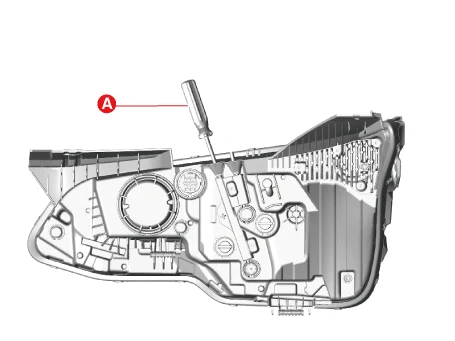
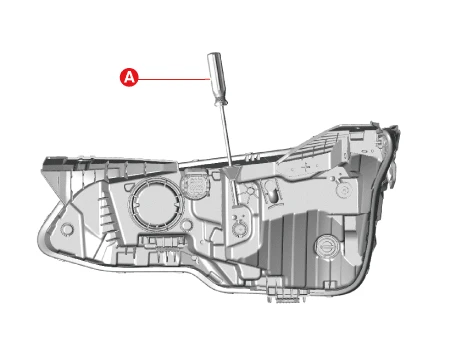
2.Disconnect the headlamp connector (A).
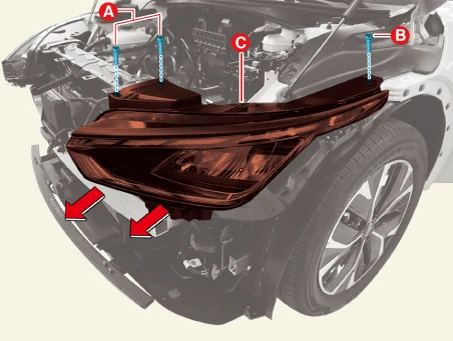
3.Remove the headlamp (C) in the direction of the arrow after removing the bolts.
Tightening torqueBolt (A) : 7.8 - 11.8 N·m (0.8 - 1.2 Kgf·m, 5.8 - 8.7 lb·ft)Bolt (B) : 28.7 - 33.9 N·m (2.9 - 3.5 Kgf·m, 21 - 25.3 lb·ft)
Installation

• When working on the high voltage system, the work should be performed by technicians who have completed the relevant training. A lack of understanding of the high voltage system can lead to serious accidents due to electric shock or short circuit.
• When working on the high voltage system or related components, be sure to observe and be aware of the "Safety Precautions, Cautions and Warnings". If not, it may cause serious accidents due to electric shock or short circuit.
• When working on high voltage system, make sure to check the Personal Protective Equipment (PPE) and high voltage shut-off procedure.
1.Install in the reverse order of removal.

Replacement

• When working on the high voltage system, the work should be performed by technicians who have completed the relevant training. A lack of understanding of the high voltage system can lead to serious accidents due to electric shock or short circuit.
• When working on the high voltage system or related components, be sure to observe and be aware of the "Safety Precautions, Cautions and Warnings". If not, it may cause serious accidents due to electric shock or short circuit.
• When working on high voltage system, make sure to check the Personal Protective Equipment (PPE) and high voltage shut-off procedure.
Absorbent
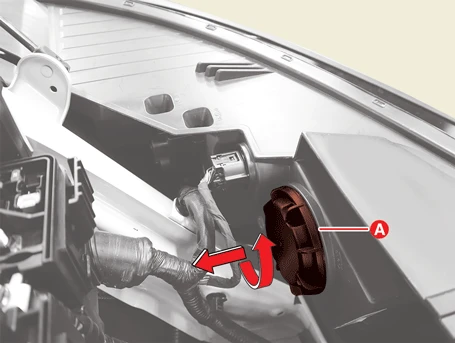
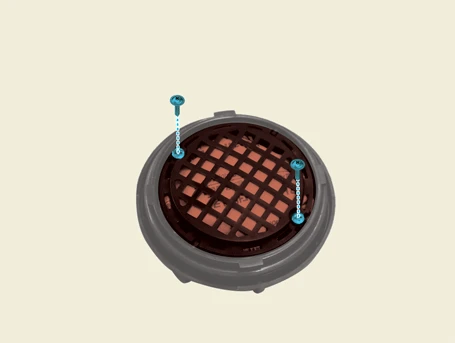
1.Remove the dust caps (A) after turning in the counterclockwise direction.
2.Remove the absorbent bracket (A) after removing the screws.
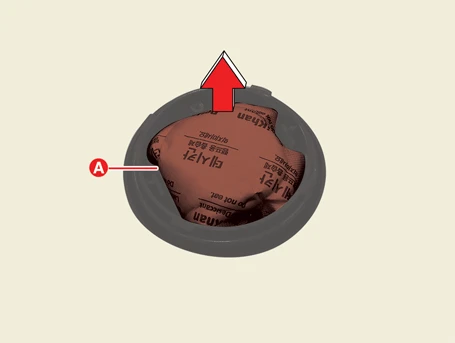
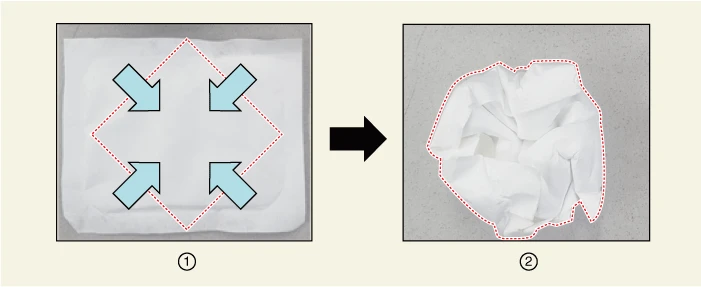
3.Replace the absorbent (A) in the direction of the arrow.

Adjustment
Head Lamp Aiming
Alternately turn the adjusting gear to adjust the head lamp aiming. If beam-setting equipment is not available, proceed as follows:1.Inflate the tires to the specified pressure and remove any loads from the vehicle except the driver, spare tire, and tools.
2.The vehicle should be placed on a flat floor.
3.Check if there is something wrong with the suspension spring.
4.Clean the head lamp lens.
5.Draw vertical lines (Vertical lines passing through respective head lamp centers) and a horizontal line (Horizontal line passing through center of head lamps) on the screen.
6.With the head lamp and battery in normal condition, aim the head lamps so the brightest portion falls on the horizontal and vertical lines.
[Standard Type]

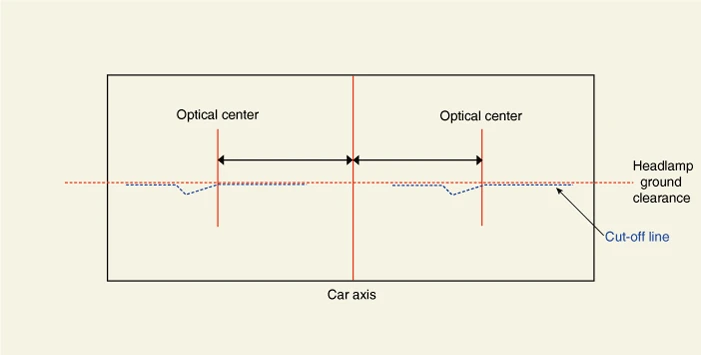
[Option Type]

Headlamp Aiming Point
[Standard Type]
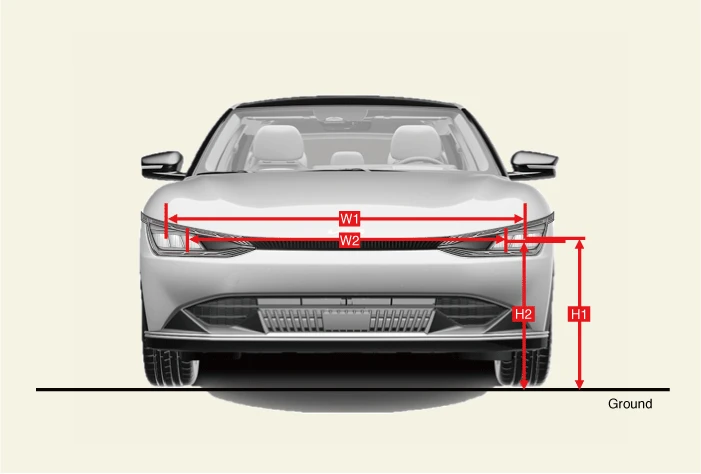

| Condition | H1 | H2 | W1 | W2 | Remark |
| Empty | 708 | 698 | 1,610 | 1,416 | ALL DIM in mm (in.) |
| 1 person on board | 698 | 688 |
[Option Type]


| Condition | H1 | H2 | W1 | W2 | Remark |
| Empty | 734 | 679 | 1,572 | 1,526 | ALL DIM in mm (in.) |
| 1 person on board | 724 | 669 |
[GT-Line Type]
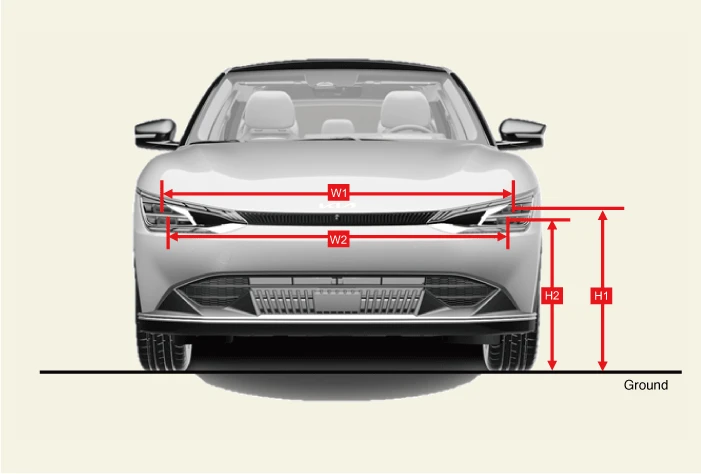

| Condition | H1 | H2 | W1 | W2 | Remark |
| Empty | 729 | 674 | 1,572 | 1,526 | ALL DIM in mm (in.) |
| 1 person on board | 719 | 664 |
[Low Beam]
1.VOR Type (Visually Optically aimed using the Right side of the low beam) :Draw a horizontal line at -0.2% from the headlamp ground clearance.
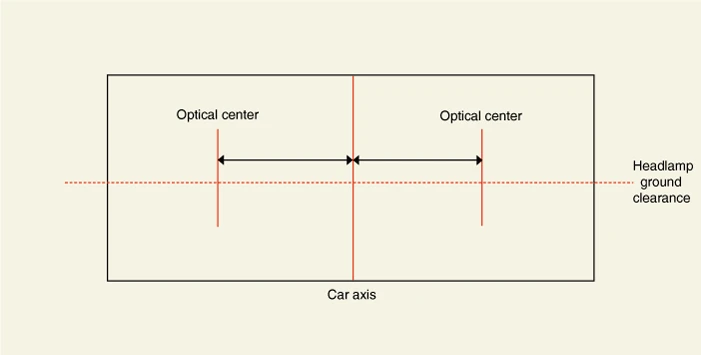
2.Turn on to low beam the check the up-down/left-right aiming position.
3.Up-down Aiming : Match the cut-off line the -0.2% line on the screen.
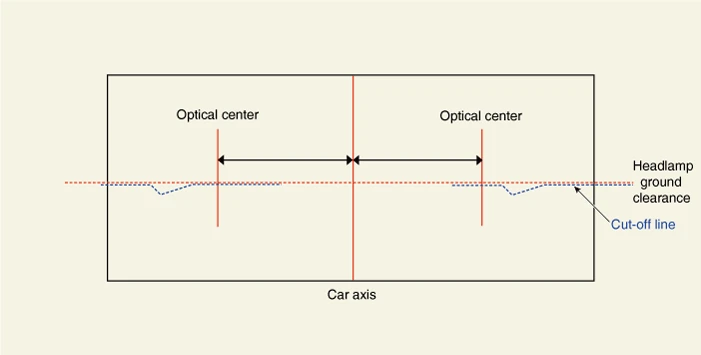
4.Left-Right Aiming : Match the left-right aiming point to the vertical line of optical center on the screen.
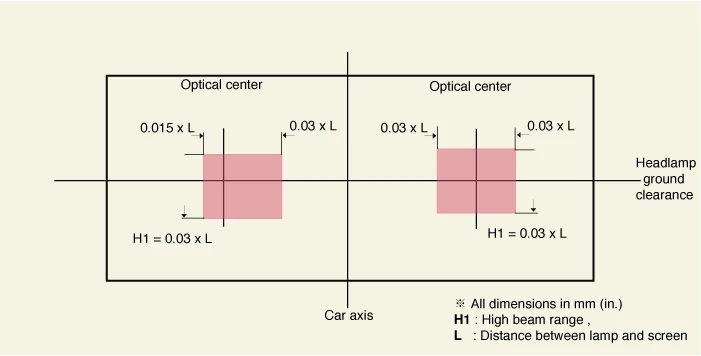
[High Beam]
1.High beam hot point must be checked after low beam aiming. (No in-line aiming)
2.If High beam hot point deviates from the below hot zone (RED BOX) after low beam aiming, this is because of defective lamps and it should be replaced.