Removal

• When working on high voltage system, the work should be performed by technicians who have completed the relevant training. A lack of understanding of the high voltage system can lead to serious accidents due to electric shock or electric leakage.
• When working on high voltage system or related components, make sure that you are familiar and comply with the "Safety Precautions, Cautions and Warnings." If you do not comply with the instructions, serious accidents due to electric shock or leakage may occur.
• When working on high voltage system, make sure to check the Personal Protective Equipment (PPE) and high voltage shut-off procedures.
1.Shut off the high voltage circuit.(Refer to Battery Control System (Standard) - "High Voltage Shut-off Procedures")
2.Remove the luggage side trim.(Refer to Body - "Luggage Side Trim")
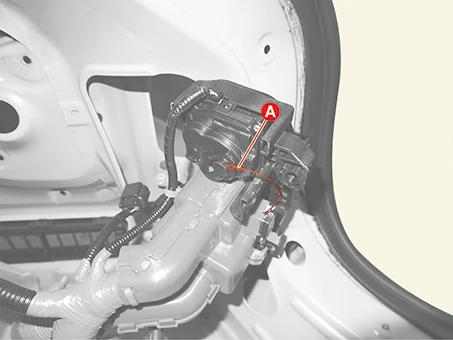
3.Separate the inlet actuator cable (A).
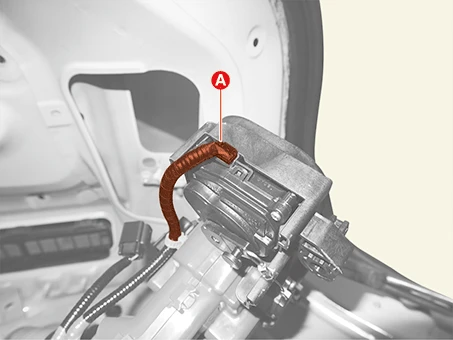
4.Disconnect the inlet actuator connector (A).
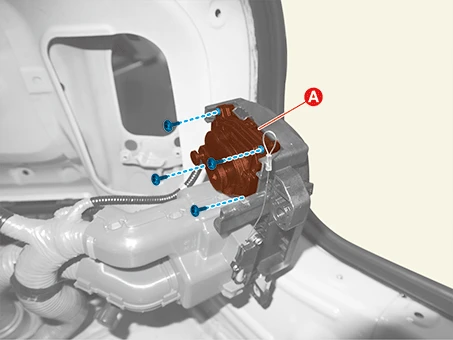
5.Remove the inlet actuator (A) after removing the screws.
Installation

• When working on high voltage system, the work should be performed by technicians who have completed the relevant training. A lack of understanding of the high voltage system can lead to serious accidents due to electric shock or electric leakage.
• When working on high voltage system or related components, make sure that you are familiar and comply with the "Safety Precautions, Cautions and Warnings." If you do not comply with the instructions, serious accidents due to electric shock or leakage may occur.
• When working on high voltage system, make sure to check the Personal Protective Equipment (PPE) and high voltage shut-off procedures.
1.Install in the reverse order of removal.

2.After replacing the inlet actuator and the related parts, vehicle should be checked that it charges normally.