Removal

• When working on high voltage system, the work should be carried by technicians who have completed the relevant training. A lack of understanding of the high voltage system can lead to serious accidents due to electric shock or electric leakage.
• When working a high voltage system, the technician must be observed and aware of "High Voltage System General Safety Information and Caution". If not, it may cause serious accidents such as electric shock or short circuit.
• When working on high voltage system, make sure to check the Personal Protective Equipment (PPE) and high voltage shut-off procedures.
1.Read the specification information of the existing front view camera before replacing it with a new one.
2.Disconnect the battery negative ( - ) terminal and the service interlock connector.(Refer to Battery Control System - "Auxiliary 12 V Battery - 2WD")(Refer to Battery Control System - "Auxiliary 12 V Battery - 4WD")
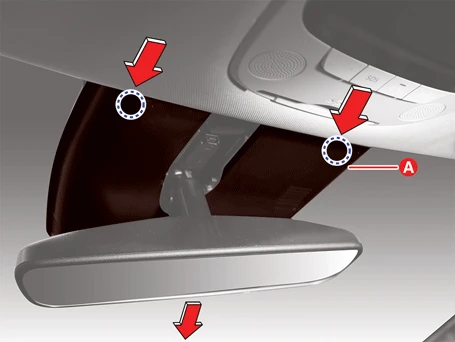
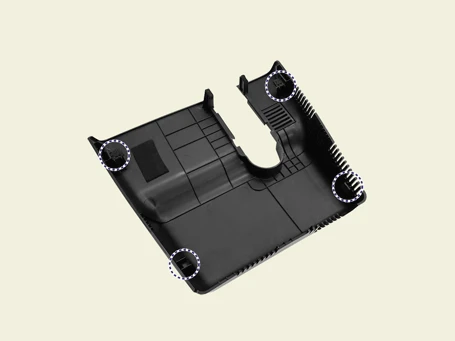
3.Remove the multi - sensor blanking cover (A).
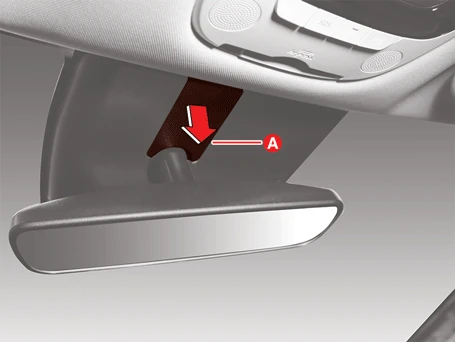
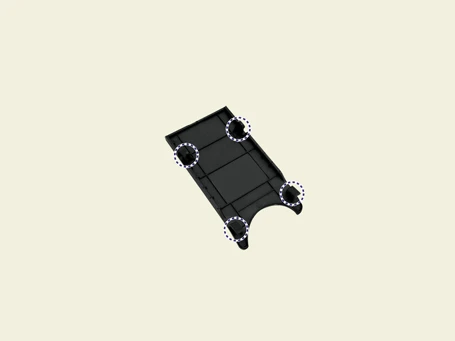


4.Remove the multi - sensor cover (A) by pushing it in the direction of the arrow.


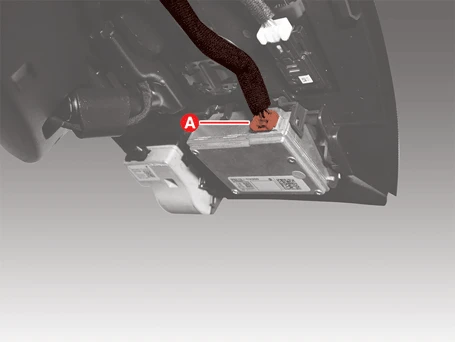
5.Disconnect the front camera connector (A).
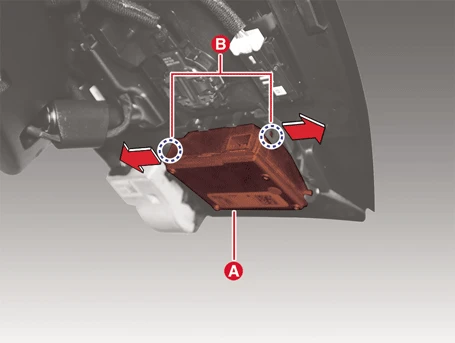
6.Remove the front camera (A) by pulling both hooks (B) in the direction of the arrow.

Installation

• When working on high voltage system, the work should be carried by technicians who have completed the relevant training. A lack of understanding of the high voltage system can lead to serious accidents due to electric shock or electric leakage.
• When working a high voltage system, the technician must be observed and aware of "High Voltage System General Safety Information and Caution". If not, it may cause serious accidents such as electric shock or short circuit.
• When working on high voltage system, make sure to check the Personal Protective Equipment (PPE) and high voltage shut-off procedures.

• Ensure the front camera windshield area is clean from any debris or contaminants prior to reinstalling the front camera.
• Install it firmly so that it makes a "click" sound.
1.Install in the reverse order of removal.
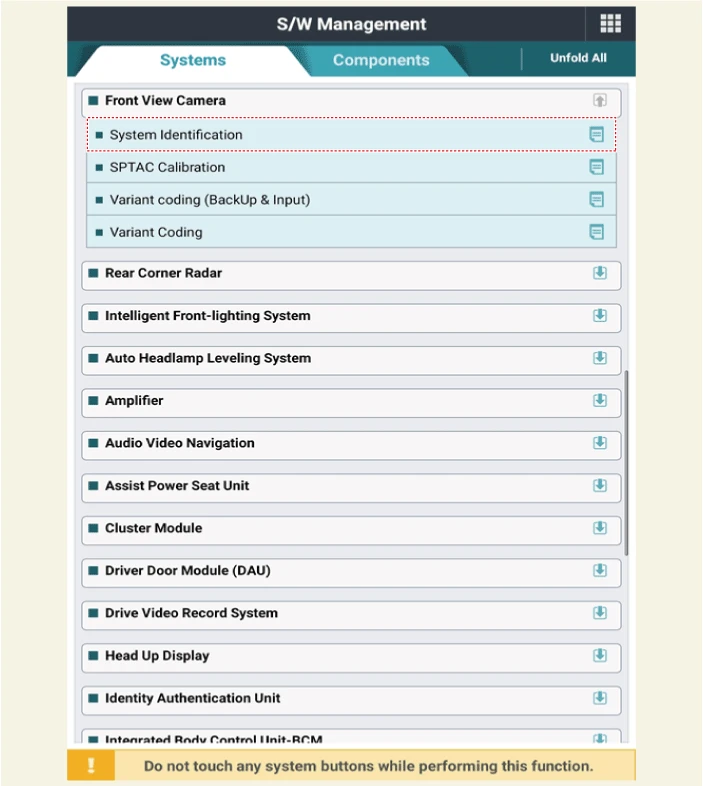
2.If the front view camera is replaced with a new one, perform the "Variant Coding" procedure using KDS.(Refer to Front View Camera Unit - "Adjustment")
Variant Coding
When variant coding needs to be performed.
Replace Front View Camera with a new one (※ EOL Variant Coding and calibration required for new replacement)Front View Camera Variant Coding

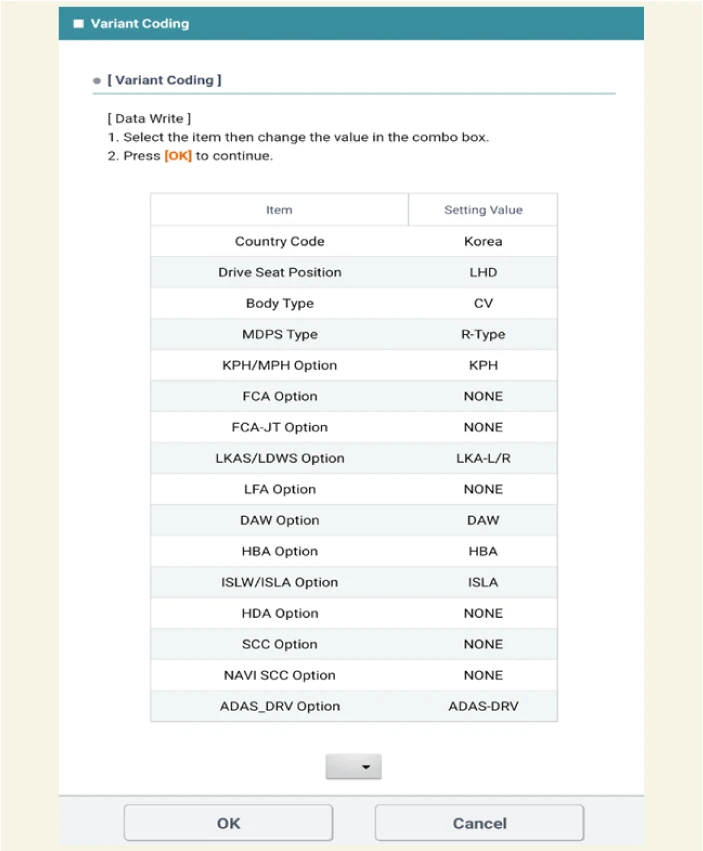
• Front view camera variant coding makes it possible to operate functions for each vehicle type.
• If the variant coding differs from the vehicle specification, the "variant coding error" DTC is displayed.
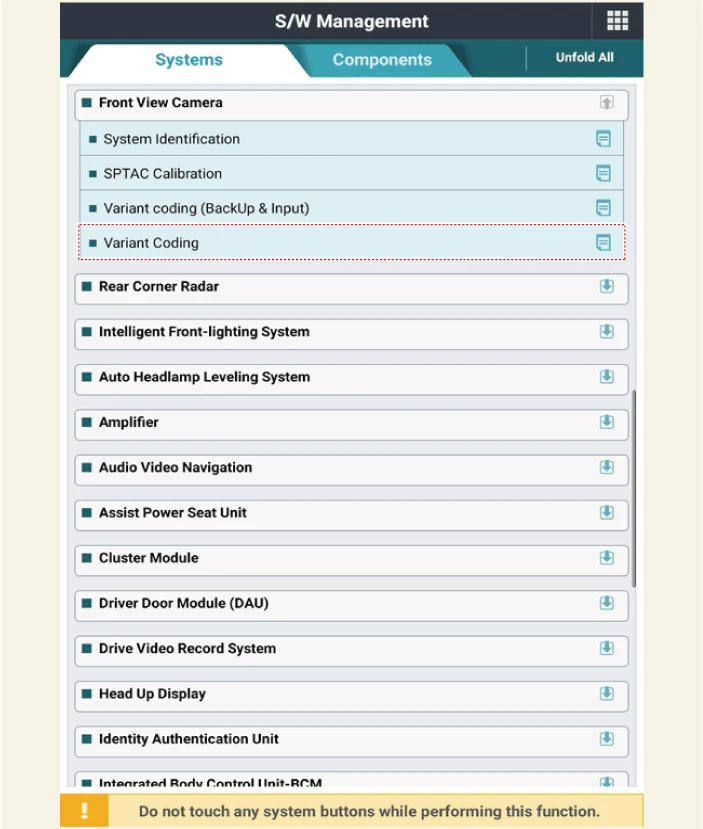
1.If the front view camera unit is replaced with a new one, perform the "Variant Coding" procedure using KDS.
2.Enter the specification value read from the existing camera into the new front camera.
Service Point Calibration (SPC)

Perform the camera calibration in the following cases.
• If the front view camera is removed and mounted
• If the front view camera is replaced with a new one (※ EOL Variant Coding and calibration required for new replacement).
• If the front view camera coupler of the windshield glass is deformed.
• If the windshield glass is changed.
• When a failure code (System Out of Calibration) occurs.
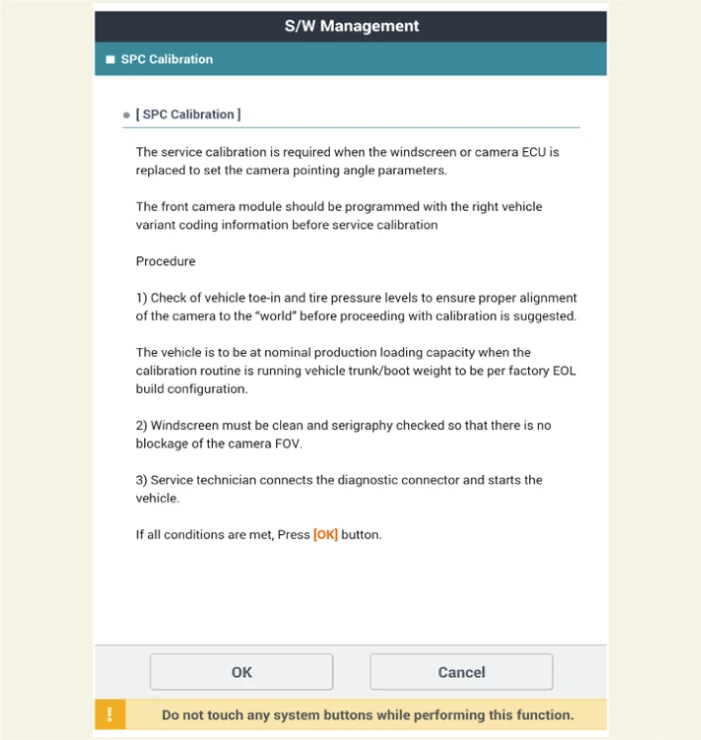
Check the items below before performing the camera calibration.
• Check for vehicle alignment and tire pressure for accurate camera calibration.
• Windshield must be clean and free of any dirt or object.
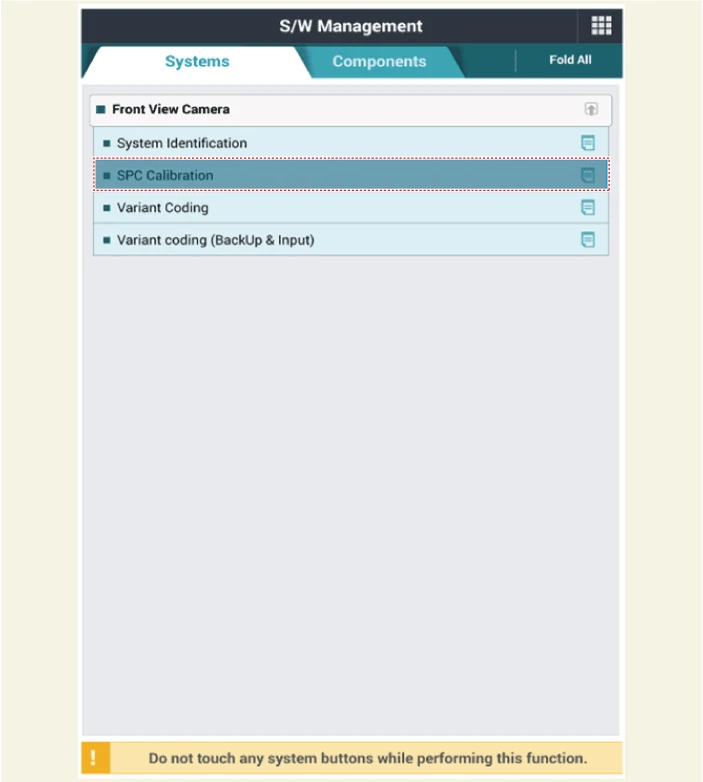
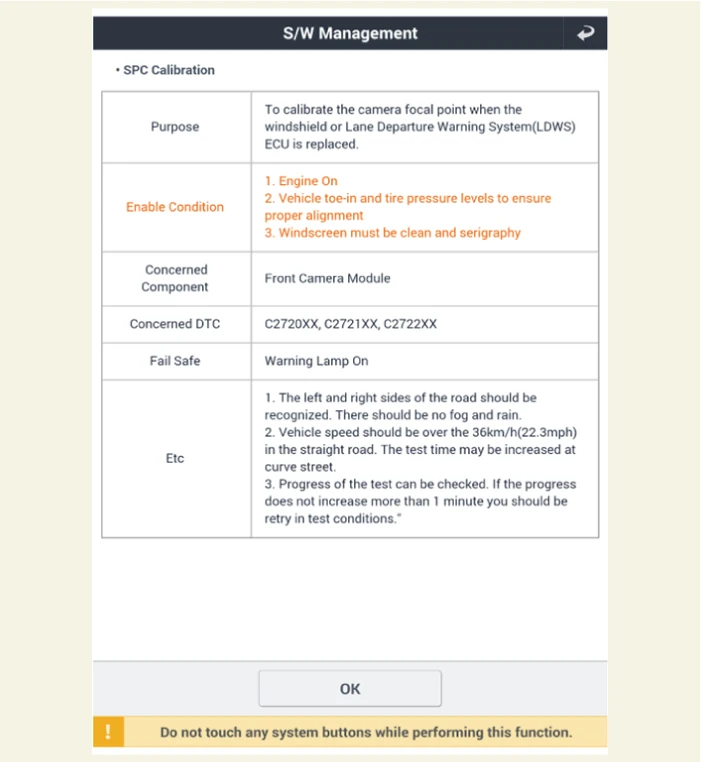
Service Point Calibration (SPC)
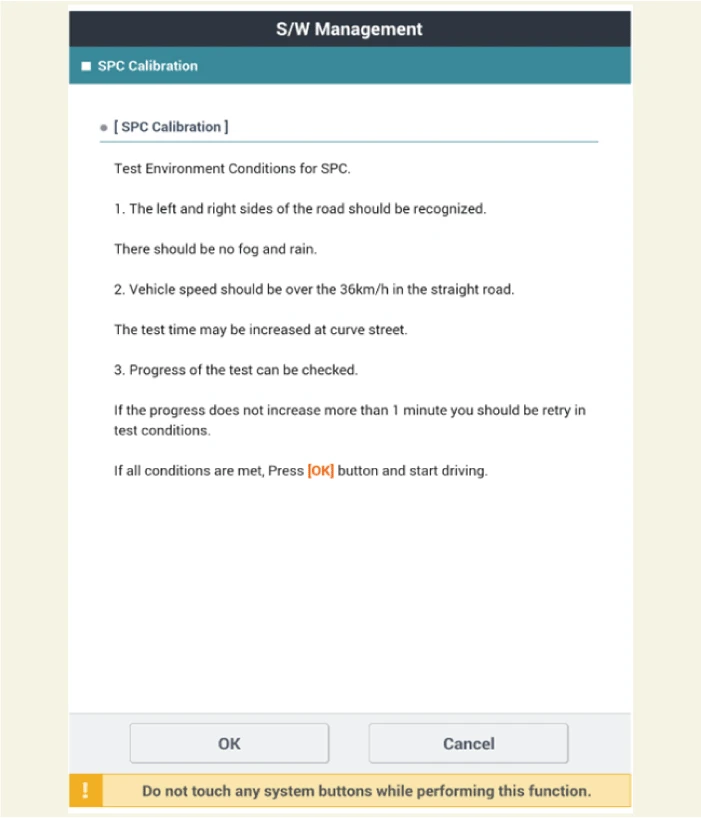
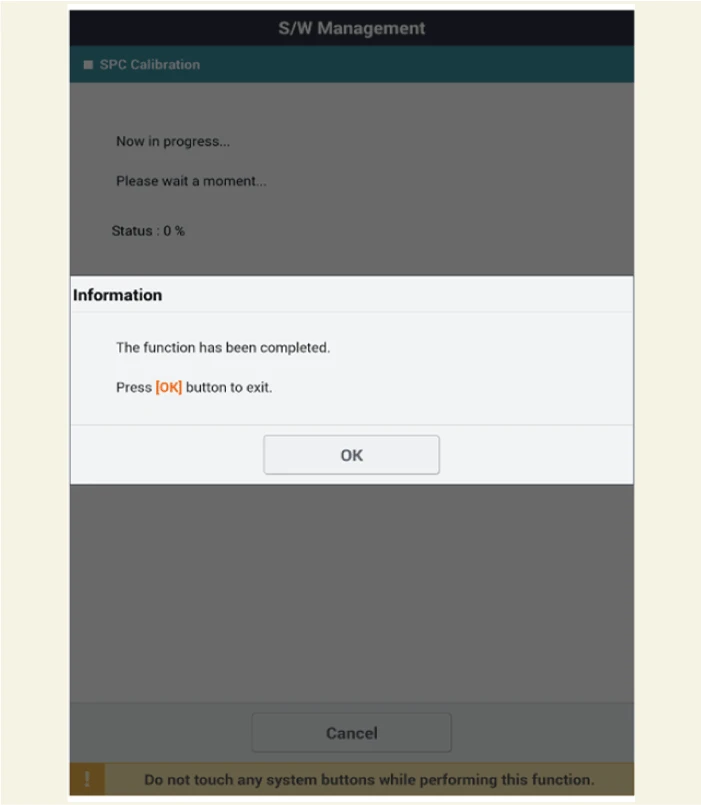
Perform the automatic tolerance correction of the front camera using the diagnostic tools.
