Description
• The Driver Airbag (DAB) module is installed on the steering wheel and is electrically connected to the SRS Control Module (SRSCM) via the clock spring. In the event of a front collision, the airbag is deployed to protect the driver.
• The clock spring is a device that transmits the operation signal generated from the sensors installed on the front and side of the vehicle to the inflator (gas generator) of the airbag module via the internal cable. It also transmits the steering wheel remote control switch and horn operation signals to the system via the internal cable.


Troubleshooting
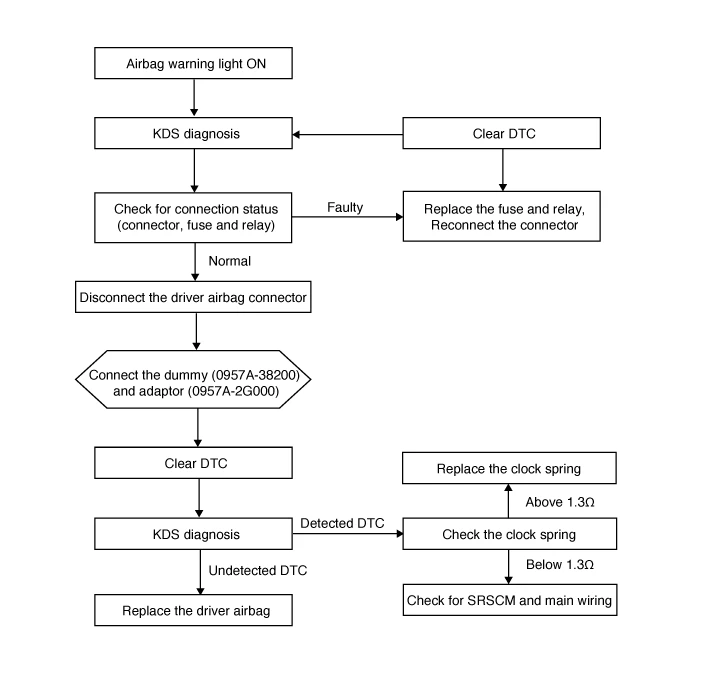
Airbag warning lamp on
The Drive Airbag (DAB) Inspection Procedure
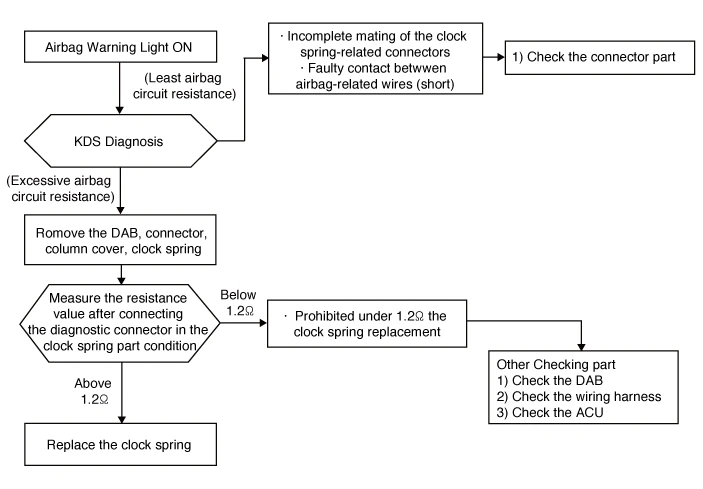
The Clock Spring Inspection Procedure
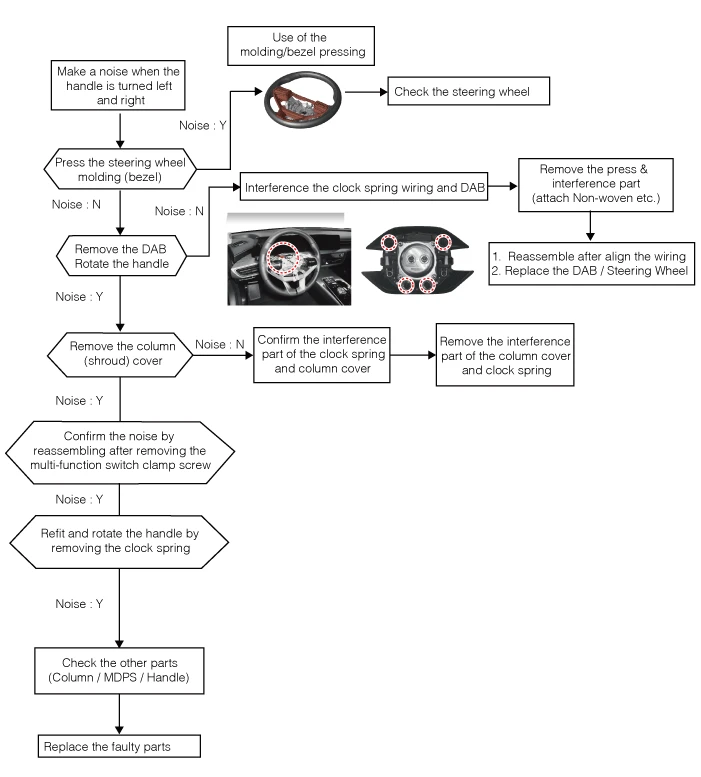
Noise
The Clock Spring Inspection Procedure
Removal

• When working on the high voltage system, the work should be performed by technicians who have completed the relevant training. A lack of understanding of the high voltage system can lead to serious accidents due to electric shock or short circuit.
• When working on the high voltage system or related components, be sure to observe and be aware of the "Safety Precautions, Cautions and Warnings". If not, it may cause serious accidents due to electric shock or short circuit.
• When working on high voltage system, make sure to check the Personal Protective Equipment (PPE) and high voltage shut-off procedure.
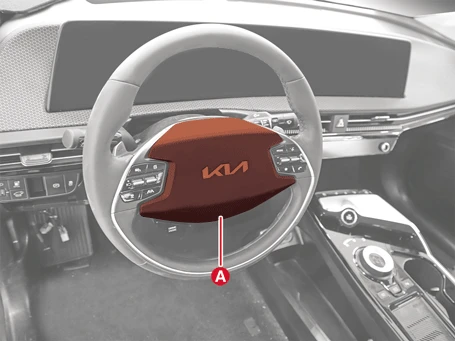
Driver Airbag (DAB) module
1.Disconnect the battery negative ( - ) terminal and the service interlock connector.(Refer to Battery Control System - "Auxiliary 12 V Battery - 2WD")(Refer to Battery Control System - "Auxiliary 12 V Battery - 4WD")
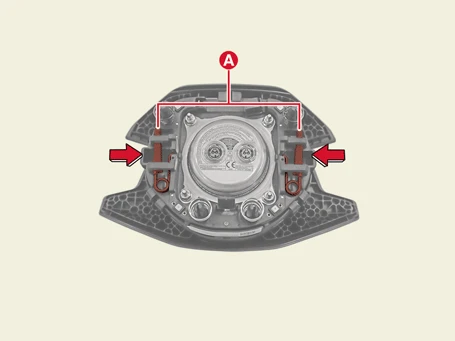
2.Remove the driver airbag module after pressing the fastening pins using the service holes (A) on the back of the steering wheel.
3.Remove the Driver Airbag (DAB) module (A).
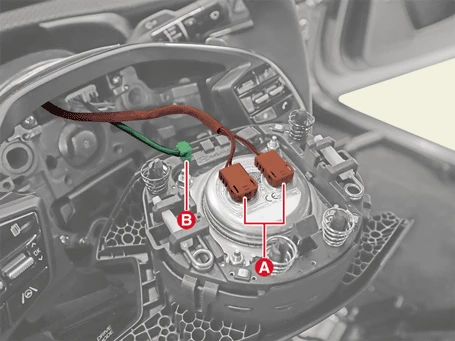
4.Disconnect the airbag module connector (A) and horn connector (B).
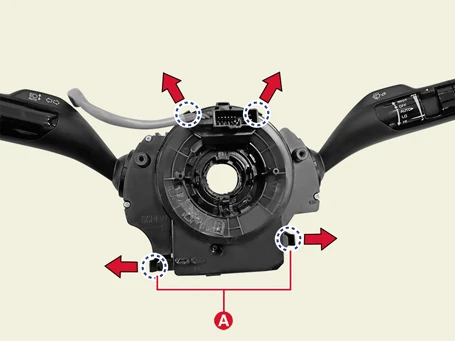
Clock Spring
1.Disconnect the battery negative ( - ) terminal and the service interlock connector.(Refer to Battery Control System - "Auxiliary 12 V Battery - 2WD")(Refer to Battery Control System - "Auxiliary 12 V Battery - 4WD")
2.Remove the steering wheel.(Refer to Steering System - "Steering Wheel")
3.Remove the steering column shroud lower panel.(Refer to Body - "Steering Column Shroud Panel")
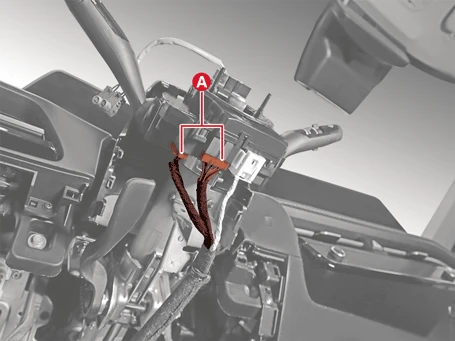
4.Disconnect the clock spring connectors (A).
5.Remove the clock spring (A) screw.
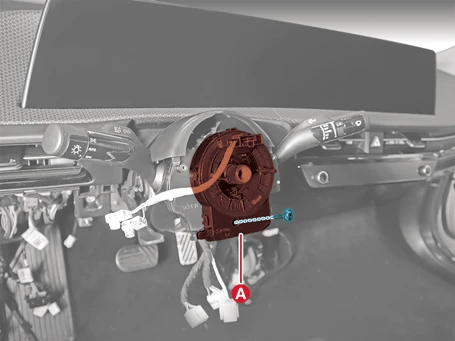
6.Remove the clock spring (A) after releasing the fixing hooks.


Installation

• When working on the high voltage system, the work should be performed by technicians who have completed the relevant training. A lack of understanding of the high voltage system can lead to serious accidents due to electric shock or short circuit.
• When working on the high voltage system or related components, be sure to observe and be aware of the "Safety Precautions, Cautions and Warnings". If not, it may cause serious accidents due to electric shock or short circuit.
• When working on high voltage system, make sure to check the Personal Protective Equipment (PPE) and high voltage shut-off procedure.
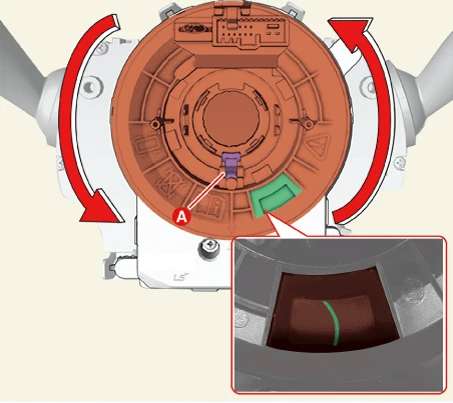
1.Set the clock spring in neutral position before assembling into the vehicle.
– When the vehicle steering is straight, the clock spring is in a neutral state.
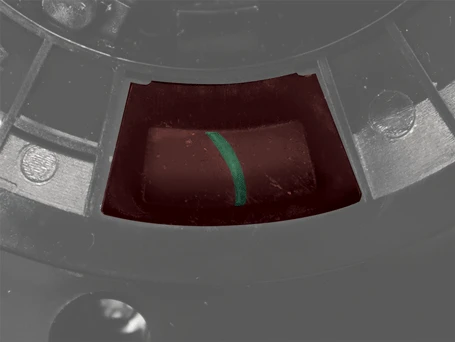
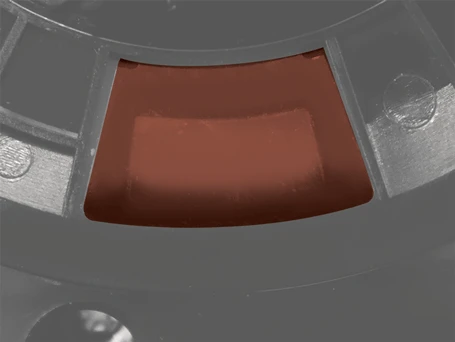
– If white cable is visible through the product's 5 O' Clock Neutral Check Window, then the spring is at neutral.
– If white cable is not visible through the product's 5 O' Clock Neutral Check Window, then manually adjust the setting to neutral.

| Neutral Check Window : Normal | Neutral Check Window : Fault |
|
|
|
| White cable is visible through 5 O' Clock Neutral Check Window | White cable is not visible through 5 O' Clock Neutral Check Window |
2.Clock spring manual neutral setting procedure.
(1)Press the Auto Lock (A) at 6 O' Clock and turn clockwise 3 rotations.
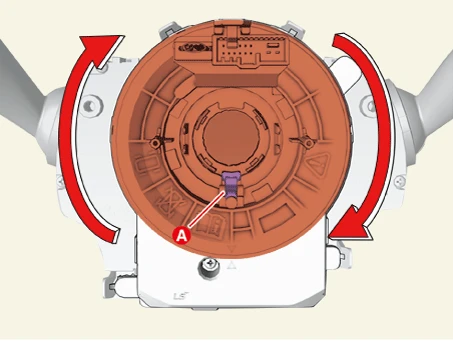
(2)Press the Auto Lock (A) at 6 O' Clock and turn counter-clockwise 3 rotations.
(3)If white cable is visible through the 5 O' Clock Neutral Check Window, then the spring is set to neutral.
3.Connect the clock spring wiring harness and horn wiring harness connector at the clock spring.
4.Tighten the screw after install the steering column shroud.
5.Install the steering wheel.(Refer to Steering System - "Steering Wheel")
6.Install the airbag module.
– When assembling the DAB module to the wheel, make sure that the airbag wire is not caught in the wheel's internal structure.
– Assemble the airbag wire while pressing it toward the center of the module.Connect the battery negative ( - ) terminal and the service interlock connector.
7.Connect the battery negative ( - ) terminal and the service interlock connector.(Refer to Battery Control System - "Auxiliary 12 V Battery - 2WD")(Refer to Battery Control System - "Auxiliary 12 V Battery - 4WD")
8.After installing the airbag module, check if the airbag system and horn operates normally.

• If IG is ON, the SRS indicator light should turn off after turning on for about 6 seconds.
Inspection
Airbag Module
Replace the airbag module with a new one when a problematic part is found during the inspection.
1.Check the airbag module for dents, cracks, or deformation.
2.Check the hooks, connectors and terminals for damage, and harness bundles.
3.Check the airbag inflator case for dents, cracks, or deformation.