manager@kiaev6.org (915) 212-77133

Kia EV6: Rear Motor and Reduction Gear Mounting

Components and Components Location

Kia EV6. Rear Motor and Reduction Gear Mounting

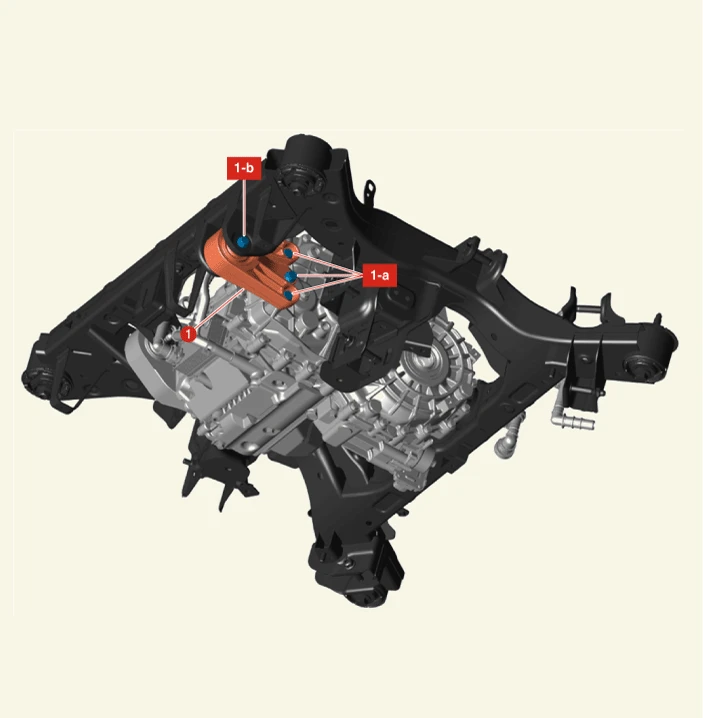
1. RH Motor Mounting Bracket
1-a. 63.7 - 83.4 N·m (6.5 - 8.5 kgf·m, 47 - 61.5 lb·ft)
1-b. 107.9 - 127.5 N·m (11.0 - 13.0 kgf·m, 79.6 - 94.0 lb·ft)


Removal

RH Motor Mounting Bracket

1.Remove the rear under cover.(Refer to Rear Motor and Reduction Gear System - "Rear Under Cover")

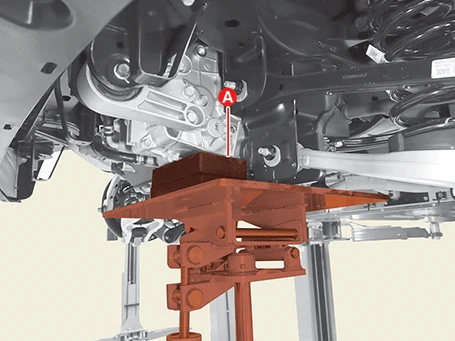
2.Support the underside of the rear motor and reduction gear assembly with a jack (A).

Kia EV6. Rear Motor and Reduction Gear Mounting

Kia EV6. Rear Motor and Reduction Gear Mounting   

Place the rubber block between the rear motor and reduction gear assembly and the jack to prevent damage.

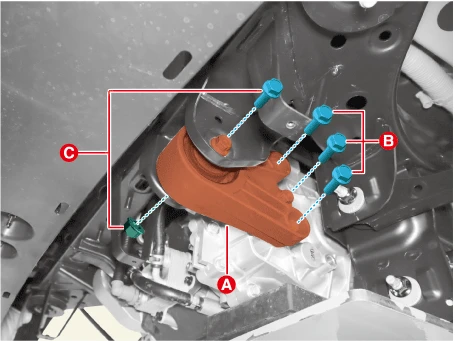
3.Remove the RH motor mounting bracket (A) after removing the bolt (B) and bolt and nut (C).

Tightening torqueBolts (B) : 63.7 - 83.4 N·m (6.5 - 8.5 kgf·m, 47.0 - 61.5 lb·ft)Bolt and nut (C) : 107.9 - 127.5 N·m (11.0 - 13.0 kgf·m, 79.6 - 94.0 lb·ft)

Kia EV6. Rear Motor and Reduction Gear Mounting

Installation

RH Motor Mounting Bracket

1.Install in the reverse order of removal.

    Previous pageRear Motor Cover

    Removal     • When working on high voltage system, the work should be performed by technicians who have completed the relevant training. It is because that lack of knowledge of ...

    PREV

    Next pageRear Motor and Reduction Gear Assembly

    Components and Components Location 1. Water Hose Assembly 2. Rear High Voltage Junction Box 2-a. 9.8 - 11.8 N·m (1.0 - 1.2 kgf·m, 7.2 - 8.7 lb·ft) 3. Multi Inverter Assembly 3-a. 4.0 ...

    NEXT
    Other information:

    Kia EV6 (CV) 2022– Workshop Manual: Precaution In Case Of Danger
    Precautions in case of danger     The EV vehicle comes equipped with a high voltage battery that can cause serious injury, like electric shocks, or even death when malfunctioning or mishandled, so follow the manual below. For additional information refer to Emergency Rescue Gu ...

    Kia EV6 (CV) 2022– Workshop Manual: Charge Door Assembly
    Removal 1.Remove the right outside rear combination lamp.(Refer to Body Electrical System - "Rear Combination Lamp") 2.Remove the flange cover (A). 3.Disconnect the charge door control unit connector (A). 4.Remove the stop / tail lamp (A) after removing the screws. 5.R ...